
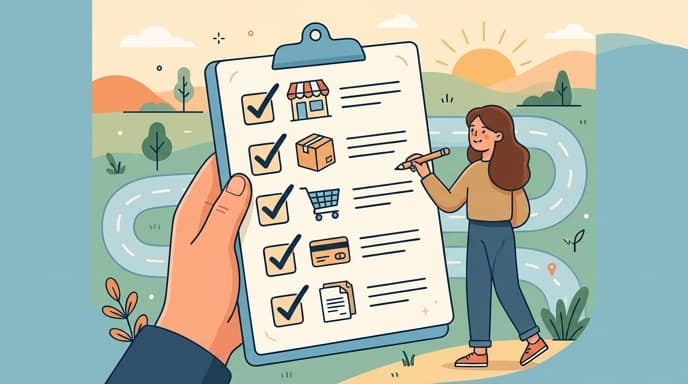
An ecommerce checklist for beginners is a step-by-step roadmap that organizes essential tasks—such as niche selection, platform setup, payment gateway testing, and legal compliance—to ensure a smooth, error-free online store launch.
Launching your first online store can feel overwhelming, but utilizing an ecommerce checklist for beginners helps alleviate stress and ensures a smooth launch by organizing tasks into a step-by-step roadmap (Gelato). By breaking down the process into clear, actionable phases, you can focus on building momentum instead of worrying about missed technical details. Whether you are setting up a dropshipping store or launching a custom brand, this guide provides the exact sequence needed to go from concept to your first sale.
1. Pre-Launch Planning and Niche Selection
Pre-launch planning requires defining your target audience, selecting a viable product catalog, and choosing a business model that aligns with your operational capacity.
Without a clear plan, beginners often struggle with unfocused marketing and high customer acquisition costs. Before building your store pages, you must decide how you will source and deliver products.
Aspiring digital marketers and e-commerce operators typically choose between three main fulfillment models:
- Dropshipping: Low upfront cost; you sell products shipped directly from a third-party supplier to the customer.
- Print-on-Demand (POD): Custom designs printed by partners only when an order is placed, minimizing inventory risk.
- Inventory Holding: Higher profit margins but requires upfront capital to purchase, store, and ship physical stock.
Once your model is selected, narrow down your target audience. Focus on a specific niche rather than trying to sell everything to everyone on day one.
2. Choosing Your E-Commerce Platform
Choosing the right e-commerce platform depends on your technical expertise, budget, and customization needs, with Shopify, WooCommerce, and Wix being the leading options for beginners.
Selecting your software stack early prevents migration headaches later. Each platform serves a different type of store operator:
- Shopify: Best for rapid deployment and ease of use. It handles hosting, security, and basic checkout out of the box.
- WooCommerce: Ideal for WordPress users who want complete ownership and deep customization options.
- Wix: A highly visual drag-and-drop builder suitable for small catalogs and simple setups.
Ensure you register a clean, memorable domain name (preferably a .com) and complete your basic hosting setup before designing your storefront. This establishes a professional brand identity from the start.
Key takeaway: Keep your initial setup lean. Choose a platform that matches your current technical skill level rather than trying to build a complex, custom-coded site from day one.
3. Legal, International Tax, and Privacy Compliance
Setting up your business legally involves registering your store name, obtaining local licenses, configuring international tax settings, and publishing regional privacy policies to protect your brand and customers.
While legal requirements vary, every professional e-commerce store must establish trust and comply with global regulations. You must address specific tax and privacy frameworks before accepting international orders.
International Tax Compliance Steps
- US Sales Tax Nexus: If selling to US customers, monitor your “economic nexus” thresholds. Most states require you to collect sales tax once you exceed $100,000 in sales or 200 transactions annually in that state.
- EU VAT & IOSS: For sales to the European Union, register for the Import One-Stop Shop (IOSS) to simplify VAT declaration and payment for goods valued under €150. This ensures your customers do not face unexpected customs fees upon delivery.
- UK VAT: If selling to the United Kingdom, you must collect UK VAT at the point of sale for consignments valued at £135 or less, requiring registration with HM Revenue and Customs (HMRC).
Regional Privacy Policy Compliance
- GDPR (General Data Protection Regulation): If you have visitors from the European Union, you must implement an active cookie consent banner (opt-in only), provide a clear way for users to request data deletion, and list your contact details in an accessible Privacy Policy.
- CCPA/CPRA (California Consumer Privacy Act): If selling to California residents, you must include a visible “Do Not Sell or Share My Personal Information” link on your footer and allow users to opt-out of automated data tracking.
Be sure to consult a legal professional or tax advisor to ensure your store is fully compliant with these regional laws before you begin processing live transactions.
4. Setting Up Your Storefront and Checkout
Designing a high-converting storefront requires building mobile-responsive product pages and thoroughly testing your payment gateways in live mode.
Your product pages are where conversions happen. To build these quickly without manual coding, you can use an AI landing page generator to create optimized, high-converting layouts that match your brand.
Use AI for the product page content
AI for product page content means drafting the headline, benefit bullets, description, FAQ, images, and SEO title and meta from the product facts, then reviewing them before publish. The field-by-field spec is in AI for product page content. A writer gives you paragraphs. A URL-to-page tool such as PageHunter drafts those fields from a product link and sends the page to Shopify or WooCommerce after you approve it.
The most crucial checklist item involves your ability to accept and collect payments at the end of the checkout process, making sure payment gateways are in live mode (WooCommerce). If your gateway remains in test mode, customers will not be able to complete their purchases.
- Verify that your payment processor (e.g., Stripe, PayPal, or Shopify Payments) is set to “Live” or “Production” mode.
- Test the checkout flow on both desktop and mobile devices to ensure a seamless user experience.
- Optimize image sizes to maintain fast page load speeds across all devices.
5. Configuring Automated Email Marketing Tools Before Opening Day
Configuring automated email marketing tools before opening day ensures you capture abandoned carts, welcome new subscribers, and deliver transactional updates from your very first transaction.
Many beginners make the mistake of launching without an active Email Service Provider (ESP) integrated into their store. Setting up these automated flows ensures you do not lose valuable customer data or potential revenue on day one.
Step 1: Select and Integrate Your ESP
Choose an e-commerce-focused ESP such as Klaviyo, Mailchimp, or Omnisend. Install their official app or plugin on your e-commerce platform to sync customer data, purchase history, and cart activity in real-time.
Step 2: Authenticate Your Sending Domain
To prevent your automated emails from landing in the spam folder, you must authenticate your custom domain. Access your domain registrar (e.g., GoDaddy, Namecheap) and add the following records provided by your ESP:
- SPF (Sender Policy Framework): Specifies which mail servers are authorized to send email on behalf of your domain.
- DKIM (DomainKeys Identified Mail): Adds a digital signature to your emails, proving they were not altered in transit.
- DMARC (Domain-based Message Authentication, Reporting, and Conformance): Instructs receiving servers how to handle emails that fail SPF or DKIM checks.
Step 3: Build and Activate Core Automation Flows
Before driving traffic to your store, ensure these three essential automated email flows are active:
-
The Welcome Series: Triggered when a visitor signs up for your newsletter.
- Email 1 (Immediate): Deliver the promised incentive (e.g., 10% off code) and introduce your brand story.
- Email 2 (24 hours later): Highlight your best-selling products or social proof (reviews, testimonials).
-
The Abandoned Cart Flow: Triggered when a user adds an item to their cart, enters their email, but does not complete the purchase.
- Email 1 (1 hour after abandonment): Friendly reminder showing the exact items left behind.
- Email 2 (24 hours after abandonment): Address common objections (shipping costs, return policy) or offer a limited-time discount.
- Transactional Emails: Customize your default order confirmation, shipping confirmation, and delivery notification templates to match your brand’s voice and design.
6. Testing, Analytics, and Soft Launch
The final step before launching is installing tracking tools and running end-to-end test transactions to verify order routing and automated email notifications.
Do not launch blindly. Install tracking pixels like Google Analytics and the Meta Pixel to monitor user behavior from day one. This data is critical for optimizing your marketing campaigns later.
Perform a complete test purchase using a real credit card (you can refund yourself immediately). This ensures that the payment is processed successfully, the customer receives an automated order confirmation email, and the order details route correctly to your fulfillment system or dropshipping supplier.
If you want to accelerate your launch, you can use PageHunter to turn any product URL into a high-converting landing page in minutes. Explore our pricing plans or sign in to the PageHunter app to start building your store’s key pages today.
FAQ
Which e-commerce platform is best for beginners?
Shopify is generally recommended for beginners who want an all-in-one, low-maintenance solution, while WooCommerce is ideal for those who already use WordPress and want complete control over their website customization.
How do I test my checkout before launching?
You should run a live transaction using a real credit card for a low-priced item to ensure your payment gateway is fully operational, notifications are sent, and shipping calculations are correct, then refund the transaction afterward.
Do I need a business license to start an online store?
In most jurisdictions, you will eventually need a business license or tax registration to operate legally. It is highly recommended to check your local government regulations and consult a professional before launching.
How do I handle international taxes like VAT and sales tax?
You must monitor economic nexus thresholds for US sales tax, register for the Import One-Stop Shop (IOSS) for EU sales under €150, and collect UK VAT at checkout for UK orders under £135. Most modern e-commerce platforms allow you to automate these tax calculations in your settings.